This article explains how to change the position of the on-screen indicator in Windows 11.
When you adjust your screen brightness, volume, and airplane mode using keyboard shortcuts, an on-screen indicator will appear at the bottom center by default to show that action.
Microsoft is exploring a new hidden feature in the latest builds of Windows 11 that lets you move the hardware indicators for brightness, volume, airplane mode, and others to different positions on your screen.
To try this experiential feature, use the ViVeTool and enable it with the command below.
vivetool/enable/id: 48103152
Wijzig de positie op het schermaanwijzing
Scherm.
Hier is hoe het te doen.
Leer eerst hoe u de Vivetool in Windows kunt downloaden en gebruiken.
Open Vivetool met behulp van de app Windows . Voer de onderstaande opdracht uit als een beheerder om deze in te schakelen en uw computer opnieuw te starten.
vivetool/enable/id: 48103152
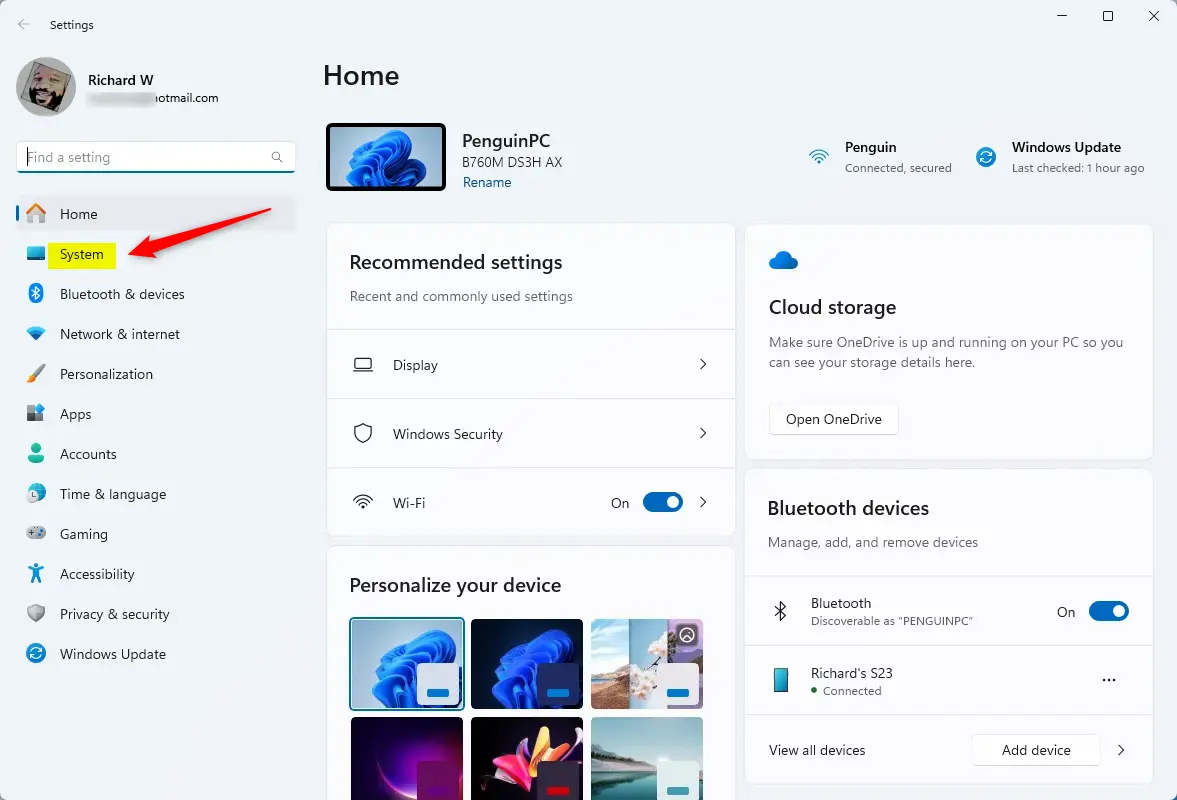
Eenmaal ingeschakeld, Open de Windows-instellingen-app.
U kunt dat doen door te klikken op het Startmenu en selecteert instellingen . Or press the keyboard shortcut (Windows key + I) to launch the Settings app.
When the Settings app opens, click the System button on the left.
On the right, click the Notifications tile to open its settings.
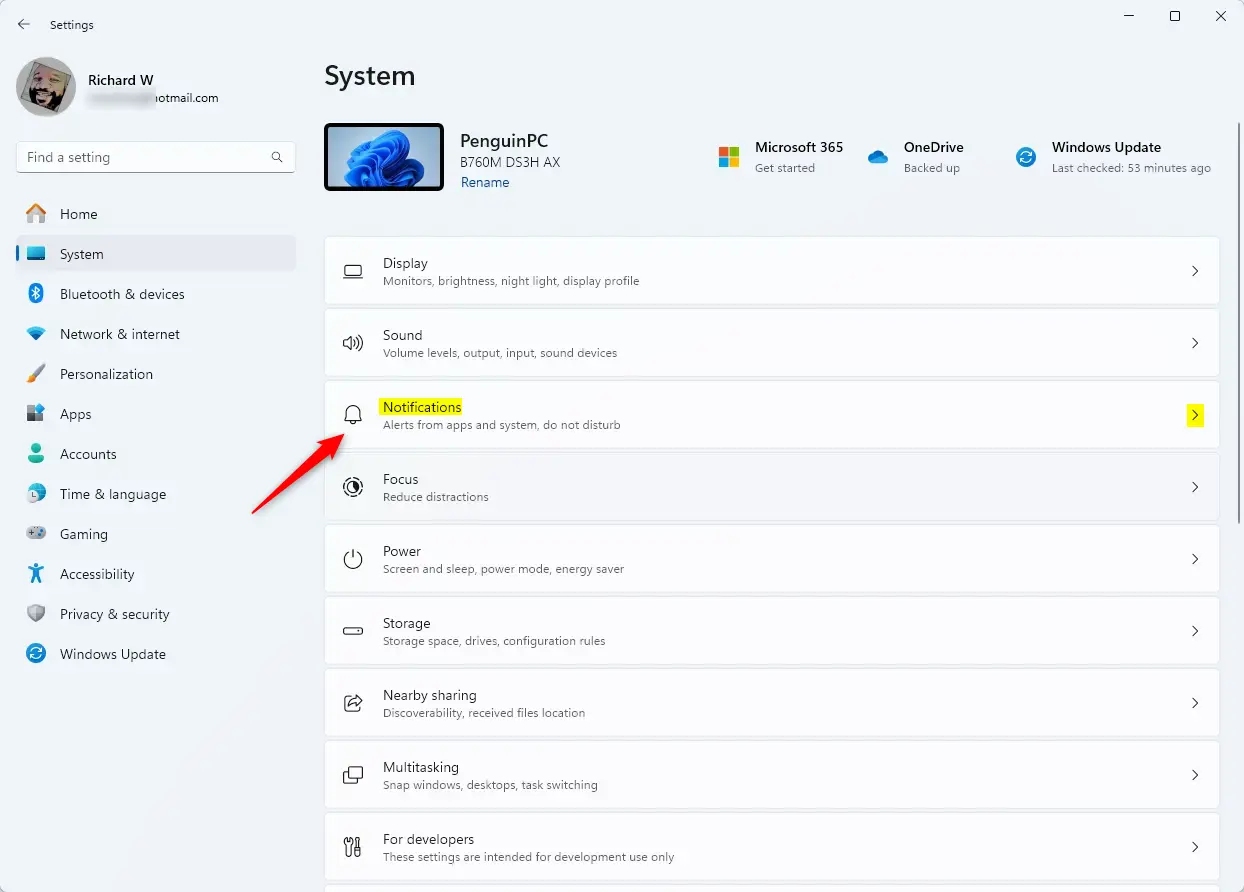
Then, choose where the on-screen indicators appear using the drop-down menu. The options are:
Bottom center (default) Top left Top center
Close the Settings app when you’re done.
Change the on-screen indicator position using the Registry Editor
Another way to set the on-screen indicator position is to use the Windows Registry Editor.
Remember to back up your registry before making any changes, or create a System Restore point as a precaution.
First, open the Windows Registry and navigate to the folder key path below.
Computer\HKEY_CURRENT_USER\Software\Microsoft\Windows\CurrentVersion\SystemSettings\ConfirmatorPosition
Right-click ConfirmationPosition > New > DWORD (32-bit) Value and name the new DWORD PositionIndex .
Dubbelklik en open de naam PositionIndex en stel de waarde in met de onderstaande tabel:
1 om de indicator op het scherm onderaan weer te geven. 2 to display the on-screen indicator at the top left. 3 om de indicator op het scherm in het bovenste centrum weer te geven.
You may have to reboot your computer to apply the changes.
That should do it!
Conclusion:
In summary, changing the position of the on-screen indicators in Windows 11 allows for a more customizable user experience. Here are the key points to remember:
You can move brightness, volume, and more indicators using the ViVeTool. De indicator op het scherm kan worden geplaatst in het onderste midden (standaard), linksboven of bovenste midden. Adjustments can also be done via the Windows Registry Editor for advanced users. Een back-up altijd van uw register of maak een systeemherstelpunt voordat u wijzigingen aanbrengt. A reboot may be necessary for changes to take effect.
Following these steps, you can personalize your Windows 11 interface to suit your preferences better.